TEMPLATE EXPLANATION
This section of the guide has the purpose to explain the characteristics of the excel templates and how to work with them.
1) Structure of the template-rows
The generated Excel template contains all the worksheets and fields based in the U4 ERPx configuration (relations, flexifields...).
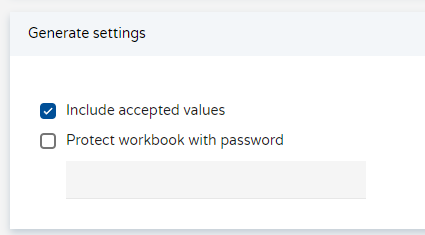
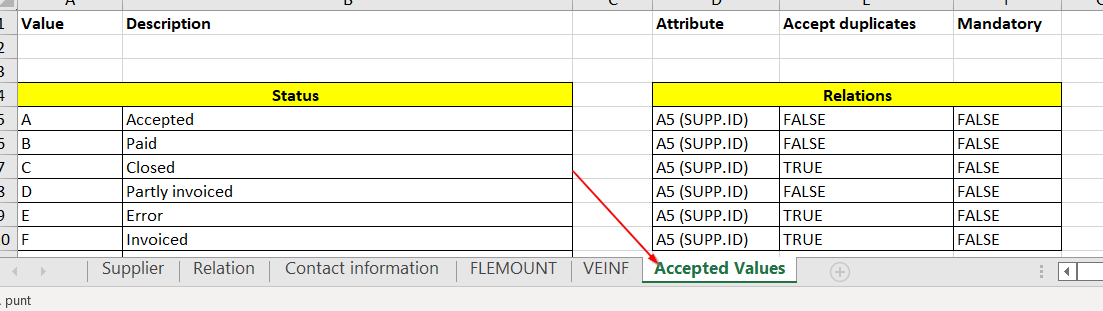
Additionally if you have checked the Accepted Values option, an extra tab will also be generated.
The generated Excel template contains three standard rows:
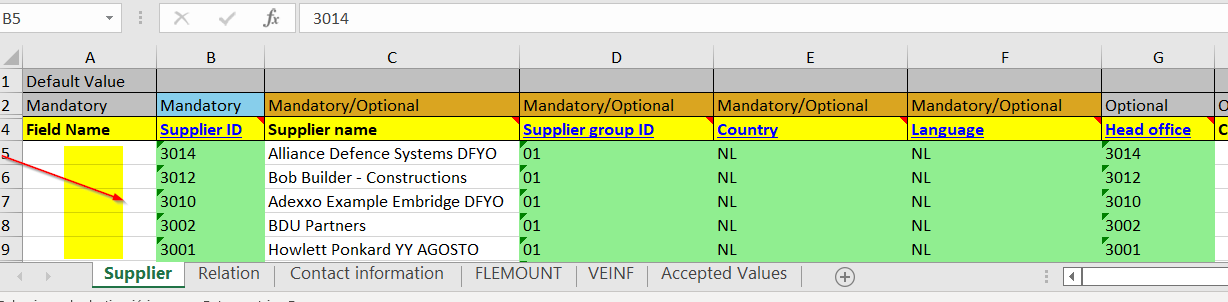
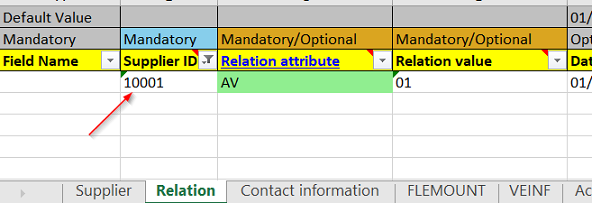
1.1) Row 1: Default Value.

A default value can be indicated for all fields, when you want to insert a record and this field has been left blank in the subsequent rows. Also applied when updating, if the field doesn't have a previous value in the data base.
1.2) Row 2: Condition.

- Mandatory. Any mandatory field that must contain a value appears in BLUE.
- Optional. Fields are indicated in GREY and are not mandatory.
- Mandatory/Optional: Fields that may be mandatory (insert) or optional (update) depending on whether the data is being inserted or updated are indicated in ORANGE.

1.3) Row 3: Field Name.
Name of the field being entered.

Notice that the fields in which Field Name is underlined and in BLUE, are validated against the "accepted values" tab"". Click on these fields to go to the Accepted Values tab to check the allowed values.
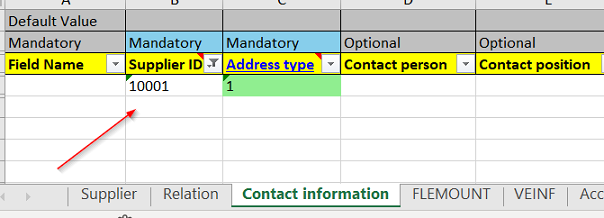
1.4) Subsequent rows.
Data to be entered. In this case, each supplier will have a separated row in the Excel sheet.
The Id used for each master file or transactional data, should be the same in the differnt tabs when you are adding information to the same record.
Example: Supplier Id
2) Structure of the template-tabs
Each template will contain different tabs. Some of them are standard and some other (for instance flexi-fileds) will depend on the U4 ERPx configuration for the masterfile.
2.1) Working with relations
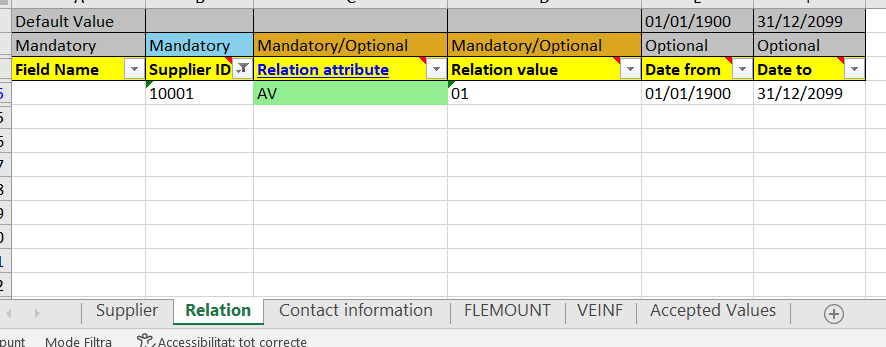
All the templates for master files contain a tab called "relations", that will be based in the configuration of the U4 ERPx.
Relational values can be inserted when we create a new master file record, or can be updated in the updating process.
In the "Accepted tavalues" tab, you will find the specifications and conditions for the relations.
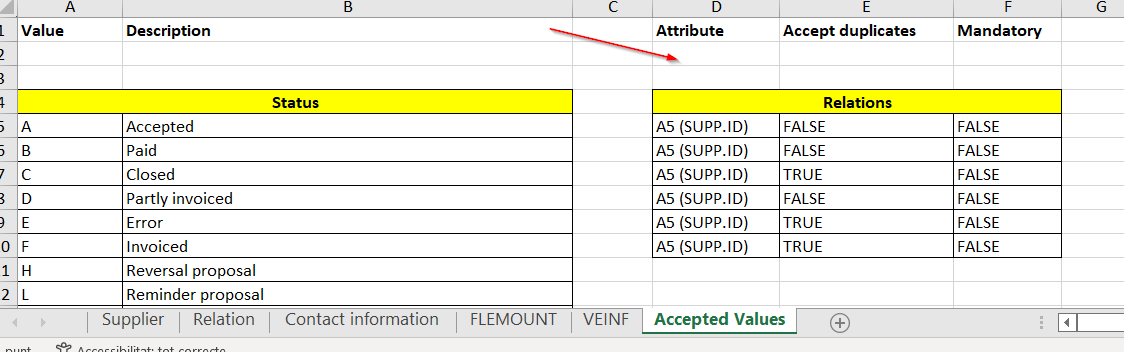
As it happens in U4 ERPx, in order to load values of a relation to a master file, we must remember that these relational values, must be previously created. If they are not, we have the following options:
- If the relation is optional
- (1) Insert-load the master file without the relational values
- (2) Populate the relational values manually or with Iconnect
- (3) Update the Master file with the right relational values
If the relation is mandatory, we can:
- (1) Insert the master file with a dummy relational value
- (2) Populate the relational values manually or with Iconnect
- (3) Update the Master file with the right relational values
OR
- (1) Turn the relation from mandatory to optional
- (2) Insert the master file without the relational values
- (3) Populate the relational values manually or with Iconnect
- (4) Update the Master file with the right relational values
- (5) Turn the relation back from optional to mandatory
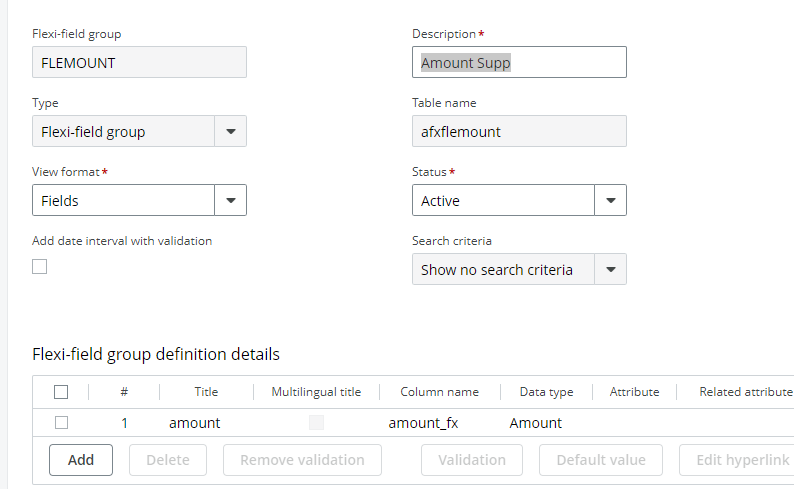
2.2) Working with flexifields
Flexi-field groups for the attribute values are also incorporated in Iconnect, displaying them as tabs in the same way as the master file.

Each flexi-field group is a separate tab. The name of the tab in the excel file will be the Id of the flexiflied group (not the description).
3) Data Validation
Several levels of validation are performed when uploading information to Unit4 ERPP using Iconnect.
Level 1 - Color based Automatic Recognition of Attribute values
Fields containing attribute values will be checked by the tool and where the value exists in the Accepted Values sheet, the field will be automatically coloured green. Where the attribute value does not exist, the field will be coloured red..
Level 2 - Common errors
Iconnect validation is performed where common errors arise (i.e., non-existing attribute values, etc.). If errors are encountered at this level, a detailed situation is detalied in the "Task log" acreen If no errors are found at this level, the full list of records populated in the Excel will be loaded, so the upload process starts.
Level 3 - Validations by U4 ERPx
At this level, a second, more specific validation is performed by U4 ERPx (As when pressing Save in the UNIT4ERP window). If errors are encounteredat this level, a detailed situation is detalied in the "Task log" screen If no errors are found at this level, the full list of records populated in the Excel will be loaded, so the upload process starts.
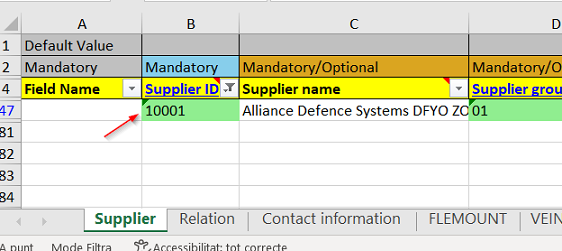
3) Autonumbering
Iconnect works with "Autonumbering" if it has been configured in U4 ERPx. Remember to do not use an ID that already exists in the data base, as in this case the process will understand that what is required is an update and not an insert.